Looking for floor preparation contractors? Houses are leaping off the market in unprecedented numbers in the current trends. First-time owners and established householders alike are acquiring properties and transforming them into their personal family homes. When it comes to renovating and modifying a home, one of the most important decisions to make is whether to replace or restore the floors. The preparation of the floor surface is the first and most pivotal phase in the setup of any type of flooring. Multiple drawbacks can emerge after the installation of your new flooring system if the floor surface has not been effectively prepped. The reason for rough ground, peeling floors, and bubbling surfaces could be that the floor was not adequately prepped before installation. Every surface must be clean, open, and porous in order for a proper floor installation to take place. Thus, in a time where home remodeling projects are becoming progressively a commonplace, some homeowners prefer to hire professional floor preparation contractors instead of doing it themselves.
During the last few years, the demand for concrete floor preparation contractors has skyrocketed, and it continues to be at an all-time high. As the number of concrete grinding projects planned intensifies, so is the number of different approaches to carry out these operations. Unfortunately, this demand also gives rise to a slew of untrained and incompetent concrete flooring companies that swiftly spring up in order to boost their profit margins. In order to successfully complete a concrete surface preparation job, you must choose concrete floor preparation contractors who have a proven track record, and a good reputation. For starters, here’s 6 things you should consider before hiring floor preparation contractors.
1. Accreditation and Permits
Professionals that provide flooring preparation services should be in possession of an up-to-date license and certification from a reputed institution to demonstrate their proficiency. There are, however, some qualified flooring installers who do not hold a certification in this field. However, it is possible that this will not function satisfactorily for you the first time. A number of public institutions and national organizations in the flooring sector regularly award accreditation to the most qualified floor preparation contractors depending on their qualifications. If you are unsure whether the product or brand you have purchased is certified for preparation, you should always ask your flooring shop to confirm. To benefit from the ideal flooring preparation services for your home project, you must employ a floor preparation contractors who are certified and licensed by the state. They should be obtained from a trustworthy company that is adequately covered under workers’ compensation laws and regulations.
2. References and Affiliations Within the Industry
Professional floor preparation contractors that have built up a network of contacts in the sector as a result of their expertise are dependable. Furthermore, flooring producers and merchants continue to seek out competent and experienced floor preparation contractors that can provide high-quality work to their customers while maintaining a sufficient level of client satisfaction and customer retention. Speaking with a contractor’s clientele is the quickest and most effective method of deciding on a contractor. Clients are not deceitful. A dissatisfied customer will never be afraid to express his or her dissatisfaction. Exceptional testimonials are a mark of distinction and one of the most dependable sources of information regarding a contractor’s ability, work ethic and overall competence as a general contractor.
3. Field Exposure
Before arriving at a decision, seek for floor preparation contractors who have been in the business for a long period of time and have a substantial number of satisfied clientele who can present references. Experience aids the contractor in troubleshooting and developing a rapid response to every new problem that arises throughout the installation process. Because of his or her years of experience working on multiple flooring projects, the contractor has a wealth of knowledge and expertise to provide that the newly graduated floor preparation contractors do not have. It is imperative to consider that freshly qualified concrete floor preparation contractors Sydney may have the skills requisite to complete that specific job at the time of hiring. It is possible, however, they may be ineffective in providing a wide range of professional guidance on differing flooring solutions.
4. Effective Communication Skills
In order to establish rapport and solid communication skills with their clients, a seasoned flooring contractor will constantly work wisely and efficiently. Customers should receive a robust feedback from the individual, whether it be through a phone call, an email, or other forms of communication. Look for a floor preparation contractors that is cordial and honest, even when it comes to his or her ability to communicate effectively. Finally, pick someone who returns your phone calls immediately, delivers free flooring cost estimates on time, and is always prepared to provide relevant response to your inquiries.
5. Flexibility
Hiring a capable and adaptable staff the first time can save you a great deal of time and effort later on when it comes time to find a floor preparation contractor to work on your new project. For example, you might be laying carpets right now, and the next time you might be installing tile on the floor. As a result, having someone you can rely on to manage all of your flooring projects becomes even more critical.
6. Promptness
A floor preparation contractor who is on time spares a substantial period of time from being squandered. Punctuality is also a good indication that the concrete floor preparation contractors regards you and your time as a client. The contractor’s efficiency and professionalism, as well as their perception of the importance of your task, are all reflected in their response time. Choosing a floor preparation contractor who is prompt and punctual will save you a great deal of aggravation in the long run, as delays in projects can be quite inconvenient for everyone involved.
From informing you of the things to consider before hiring floor preparation contractors, let me ask you something. When it comes to floor covering preparation, would you rather do it yourself? Or would you rather hire someone who is an expert in the field?
Doing it yourself is not a problem if you have the skills, tools, and knowledge to do your floor covering preparation successful. If you are not well knowledgeable enough, skilled or do not have the proper tools to do it, then you should strongly consider hiring experts to do the job. Although there are videos and articles to guide you through the process the risk of doing it is not worth it. The possibility of spending more on repairs and doing it again is greater compared when you leave it to experts which is zero to none. Here are some pros and cons when you do it yourself and hiring concrete floor preparation contractors.
FLOOR COVERING PREPARATION PROS AND CONS
PROS
COST
DIY |
HIRE |
| Every DIY endeavor is motivated by the desire to save money. To begin with, there are no labor costs. Your only cost is in materials because you are your own manual labor. Doing your floor covering preparation by yourself will greatly reduce expenses on labor and adds that self-appreciation and achievement feeling. This benefit alone can make “doing it yourself” seem appealing. | Hiring floor preparation contractors can be quite costly especially if the floor area for floor covering preparation is big but the cost of hiring them is definitely worth it as everything is included. You are paying for the work when you hire concrete floor preparation contractors to prepare your floor for you. |
FLEXIBILITY
DIY |
HIRE |
| The chance to completely design one’s own home appeals to many people. While most professionals would do whatever you want, it’s reassuring to know that you may change your mind at any time on precisely how you want it without having to tell anyone. | The decision on how you want it to be done is definitely your power when hiring floor preparation contractors. In addition, when you want your project to be more than just floor covering preparation and you decide to proceed to avail their polished concrete floor services that can definitely be arranged. |
SCHEDULING
DIY |
HIRE |
| Another benefit of preparing your own flooring is that you don’t have to wait for anyone, and no one has to wait for you. You have complete control over whether you complete the assignment in two days or six months. Many homeowners appreciate the fact that they do not have to wait for floor preparation contractors or specialists to do the project.
|
If you follow a strict schedule and difficult in finding the right available time for you to do the project, hiring floor covering preparation contractors would be the best option. There are elements and processes in the floor covering preparation that needs to be done once one aspect is finished to make sure that everything is done properly. Doing something one time then wait for when you are next available might jeopardize the whole project. |
TOOLS AND MATERIALS
DIY |
HIRE |
| Although you might need to buy the necessary materials you also get to keep them for future use. The same tools are already available if you might want to start another floor covering preparation project in the future.
|
A skilled concrete floor preparation contractors will arrive with all of the specialized tools and supplies required to complete the task. You will not be required to provide any tools or materials. |
GUARANTEE OF WORK
DIY |
HIRE |
| The level of commitment when doing it yourself must be 100%, and when it is the guarantee of your project for your project to be successful would also be the same. That is why floor preparation Sydney are almost done through DIY and companies are now offering DIY kits which are also helpful especially during the pandemic since human interaction is limited. | Many flooring companies offer a guarantee on their work as well as a material and labor warranty. They can come back and rectify the problem for free if the job doesn’t meet your expectations or the preparation was done wrongly. When preparing floors for investment properties or commercial buildings, this form of warranty is extremely important. |
CONS
TIME
DIY |
HIRE |
| If you prefer to prepare your own flooring, as previously stated, you are free to set your own schedule. However, if you have never prepared flooring before, it can take you a little longer than you anticipate. The main risk of any DIY project is that job, relationships, and other responsibilities will divert your focus away from it, and before you realize it, months have passed. If you want to do your own floor covering preparation, set aside a particular amount of time to complete the operation. | When hiring concrete floor preparation contractors, you there are bound to be schedule overlaps. You need to find a schedule that works for both of you whether it is your availability to supervise or them being available if they have other clients during the time you want it done. |
DANGER OF MESSING UP
DIY |
HIRE |
| Every DIY job is a learning experience, but the risk of messing up and having to start over with DIY floor covering preparation is particularly high. In the end, a stupid mistake can cost you more money than hiring a pro in the first place. As a result, rather than risk losing your investment, we advise leaving significant tasks to professional organizations. | The danger of concrete floor preparation contractors to mess is relatively low since they know what they are doing but when they do this can make the project run for long. |
NO INSURANCE
DIY |
HIRE |
| Having your floor covering preparation by a professional gives you peace of mind. When working on a DIY project, the onus is entirely on you. It is the responsibility of an honest, respected organization to provide exceptional service. It is their responsibility to make things right if they make a mistake. | When you opt to hire concrete floor preparation contractors make sure that they have insurance because if they do not that would be a great ordeal for you to face in the future once you find out something is wrong especially for big projects like installing commercial kitchen epoxy floor coatings and the like.
|
LIMITED AVAILABILITY
DIY |
HIRE |
| Although it is up to you when you want to work depending on your availability, it is still difficult when you work full time and have other responsibilities that you can not move aside. Remember this project is not a two days one night project, it might take some time much more if you are still learning to do it. | If a concrete floor preparation contractors you want to work with is too busy to take on the job, you may be placed on a waiting list. This may cause your project to be placed on hold for a few weeks, delaying your other plans. |
But what are the dos and the don’ts of floor covering preparation? Read on and I will tell you.
When it comes to an optimal industrial flooring installation, proper preparation of the substrate surface preceding to the implementation of the flooring system is imperative. Unfortunately, the dangers of a poorly prepared concrete surface can exhibit themselves almost immediately after installation — however, floor covering preparation, undertaken by floor preparation contractors with the appropriate profile, can facilitate in ensuring an effective bond between coatings and the substrate, thereby maximizing the potency, longevity, and aesthetic value of a floor surface.
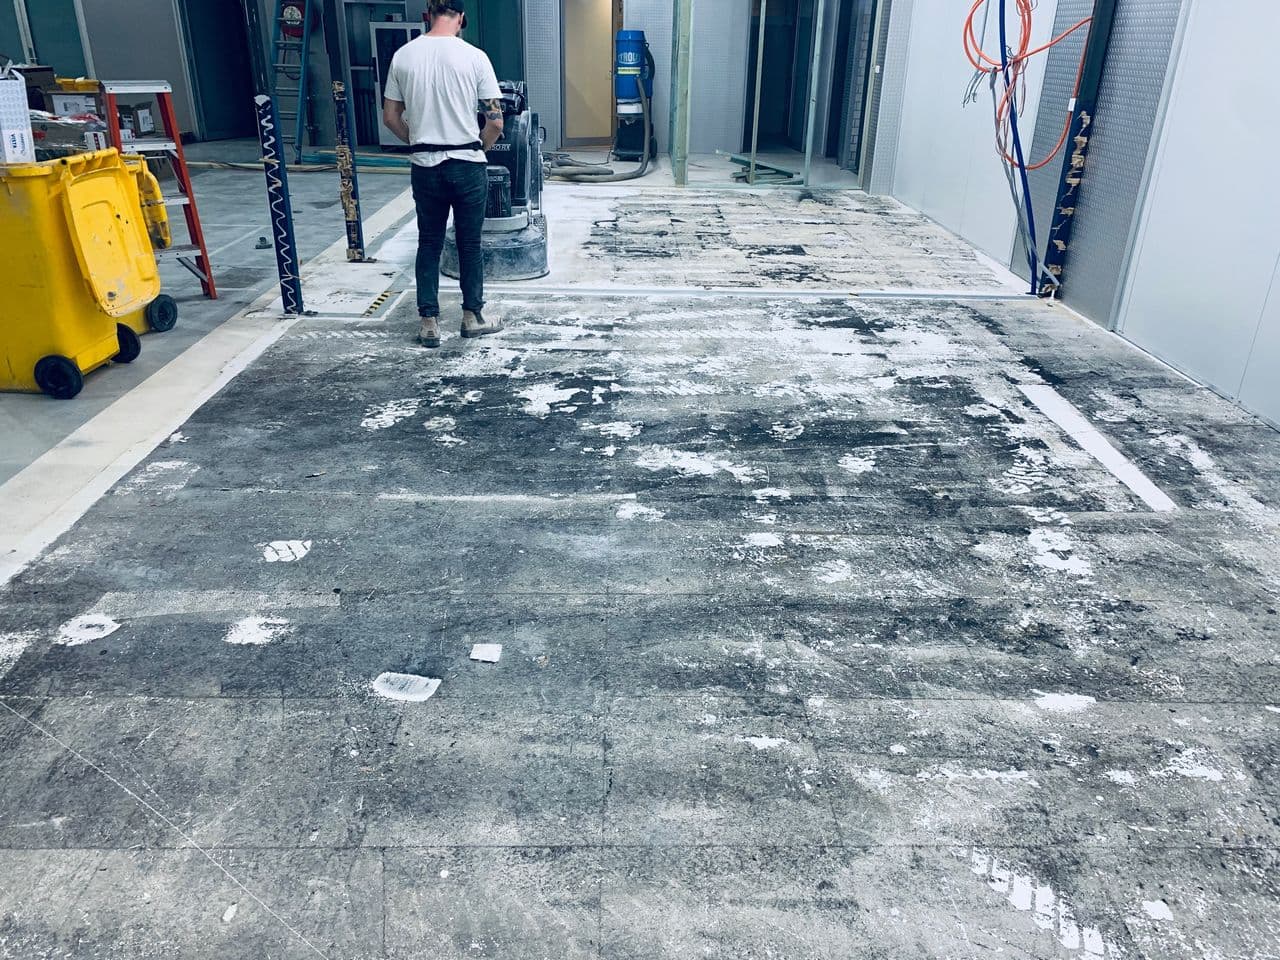
By appropriately priming the surface, labor and expense can be saved, as well as the high probability of coating breakdown and costly overhaul being decreased dramatically. In Sydney, floor covering preparation includes leveling, scraping, grinding, sealing, cleaning, and/or totally replacing the plywood flooring. This also leads us to a general means of grinding.
What is Floor Covering Preparation in a nutshell?
Floor covering preparation is the process of dismantling preexisting coatings or flooring frameworks and preparing the underlying concrete surface for the implementation of a new flooring system. It is also known as abrasion. The flooring in an industrial or commercial structure is likely to require repair or replacement whenever the facility is redesigned or renovated, and in many situations the flooring may need to be fully overhauled. To prepare for the installation of the new flooring system, the old flooring must be scrapped and removed from the premises. Following this, and equally as crucial, the concrete slab must be prepped in order to accommodate the installation of the new floor covering system.
 Why is Floor Covering Preparation vital?
In the implementation of any flooring system, perhaps the most imperative stage of development is floor covering preparation, which is deemed as a crucial process in guaranteeing that the new flooring system is properly applied to the surface. The preparation of the subfloor is frequently taken for granted in certain floor preparation Sydney services, owing to the amount of time spent deciding finishes and flooring selections throughout the design process.
It is possible that if the floor surface is not properly prepared prior to the assembly of your new flooring system, a range of issues will develop during its installation. If you have uneven flooring, peeling floors, or bubbling floors, it’s probable that they are the result of poor floor preparation practices. Failure to correctly prepare the subfloor may result in the failure of the entire flooring system, as well as the need for complex and costly future refurbishments or complete overhaul.
Risks of Poorly Prepped Surfaces
It is entirely feasible for multiple drawbacks to occur if concrete is not thoroughly primed and maintained prior to installing a new flooring system. These problems include uneven surfaces, poor adhesion, fractures, and holes. These side effects can be detrimental to the stability of people, machinery, and even furnishings because of their unpredictable nature. If the surface preparation is not implemented right, your new floor may disintegrate more quickly, resulting in a significant time and economic waste.
To avoid these risks, and in order to maximise the optimal efficiency of your flooring coverings, here’s a list of DO’s and DONT’s that you might want to adhere to in prepping your flooring solutions;
DO’s
· Hire an Appropriate Contractor
While this may appeal as a costly undertaking to many, hiring a floor preparation Sydney contractor can save you more money, in contrary to what is expected of professional services. The effectiveness and efficiency of the floor preparation are critical factors in determining the long-term viability of any construction project. And in order to complete the course, it is required to hire qualified concrete floor grinding contractors and floor preparation contractors that are reliable enough, and are equipped with the necessary credentials to complete the entire undertaking.
· Remove All Furniture and Wall Decorations from the Room Before the Prepping Begins
The machineries used in floor covering preparation result to vibrations that may cause wall-plastered decors of frames to fall off. It’s also imperative to empty of clear off furniture to avoid any further delays in the process.
· Systematically Arrange the Furniture in the Room.
Inclined to what is previously mentioned, the room should be organized in a way that is both neat and easy to navigate. You should make certain that the paths are free of debris and are clean. Pets, youngsters, toys, and any other fragile valuables should be kept out of the way on both the outside and the inside of the doorway so that the installer’s task is not made more difficult.
DON’Ts
· Chemical Dilution Done Inadequately
Before using floor strippers, make sure they have been thoroughly diluted with water. A common erroneous assumption made by housekeeping employees is that “stronger” is always preferable to “better.” With floor strippers, however, this is not the case. Ineffectiveness can result if floor stripper is not used in the right amount of water. Diluting it will not make it act faster or “better,” but rather will make the stripping process more complex. Chemicals that are not appropriately diluted might cause damage to floors. For example, overuse of a chemical can result in permanent bleaching of floors.
· Do not Do It Yourself
Floor preparation is not an easy undertaking — neither is it something you can do over a simple YouTube turorial. It requires skills and machineries in order to be done with full efficiency. And you wouldn’t want to suffer the risks of poorly-prepped floors wouldn’t you? And besides, it entails demolition and dismantling which may pose potential possibility to injuries if done without prior expertise.
Feeling the weight of how important having your floors should be prepped before installation? Then you are at the right track towards an efficient flooring solution!
From learning the do’s and the don’ts of floor covering preparation, allow us to discuss with you the proper bathroom floor preparation for tiling.
If you are looking to tile your bathroom, better not do it yourself and consider hiring floor preparation contractors. Many would agree that the bathroom is the only space that gives you more privacy than any other room. A bathroom provides you with more than the occasional cleanliness but also some sort of piece when you try to relax with a warm bath for an hour. So in this sense the bathroom should be given more attention in detail and most importantly function. You would notice that almost every bathroom are walled and floored with tiles, some decorative than others but there is a reason for that. Bathrooms are lined with tiles because first of all the bathroom is known to be a wet area and so tiles provide better flow for the water, but so does an ordinary concrete finish. Well, if you come to think it yes it does and a concrete finish bathroom is way cheaper than tiling it, but you would notice the difference after a year or less. Odor would stick and stay longer on a concrete finished wall compared to a tiled one. A tiled bathroom is also easy to clean and of course better looking. You might be thinking that it is an easy job and can do it yourself but would you rather spend more on repair every now and then than spend more on a guarantee one time preparation and installation? Better get a floor preparation contractors now to guarantee best results.
PREPARING FLOOR FOR TILING STEPS BY FLOOR PREPARATION CONTRACTORS
These basic steps apply to all flooring tiles in kitchen or bathroom or with any tiles, mosaic or ceramic and more. If this is your first time tiling we would recommend starting out with tiling the floor as it is a better place to begin than installing tile on a wall because it requires even more skill due to the vertical nature of the walls, in tangent with the effect of gravity.
Every project is different and not all step-by-step instructional are exhaustive. If you are doing this in your own home, you will inevitably encounter something not covered by this or any tile tutorial but if you follow these steps, generally, you will find success in your project.
STEP 1: PREP THE SUBFLOOR
This is the most important step floor preparation contractors do. This is a determining factor whether the tiling will be successful or not. But what exactly is a subfloor? It is a catch-all term for the floor underneath your finished floor. There are two primary type of subfloor: wooden and concrete. Both suffer from the same tile-killing issue: movement. Wood moves and flexes with humidity and changes in temperatures; concrete can move depending on humidity, moisture, soil movement, and temperature.
FOR WOODEN SUBFLOORS
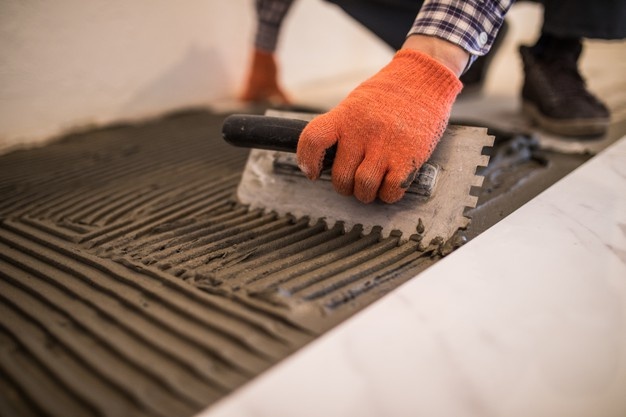
Any staples should be removed and any screws or nails that are sticking up too far should be driven down. Install a cement backer board to set a good base for your tile and prevent any movement-related cracking of tile or grout.
Backer board is screwed down to wood subfloor using specific backer board screws and mortared down with tile adhesive mortar plywood subfloor. Remember to tape and mortar the joints between the pieces of backer board. Crack prevention membrane is mortared down ion both surfaces. This membrane also acts as a waterproofing membrane and is helpful addition in a wet area, a second floor, or a plywood subfloor application. A notched trowel is used to spread the mortar at a 45-degree angle to the plywood subfloor.
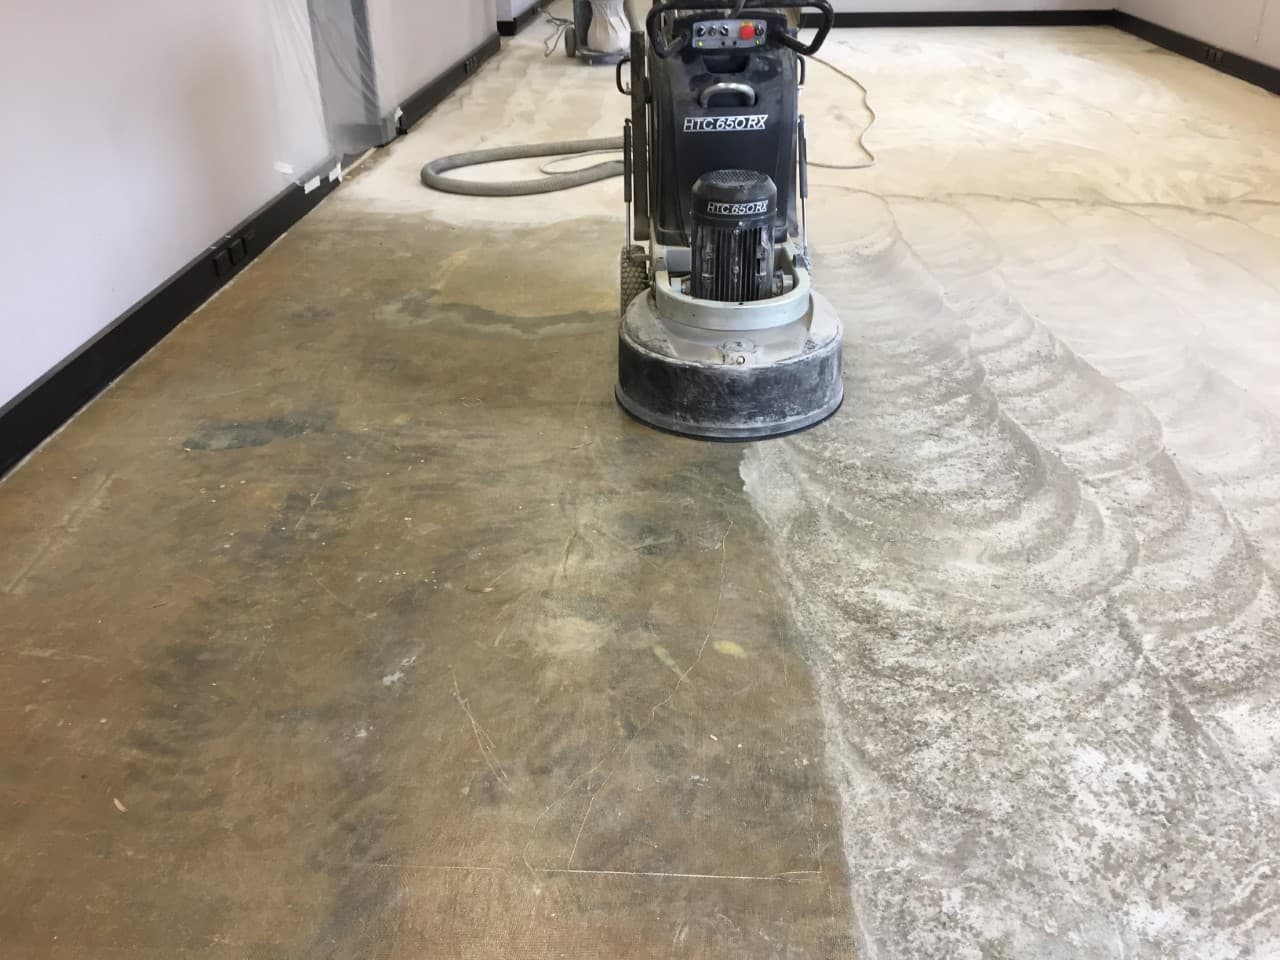
FOR CONCRETE SUBFLOOR
When dealing with concrete subfloors, any old adhesive should be removed and any cracks should be patched/filled with the appropriate product. You could always look up for stores or ask for advice from experts on floor preparation Sydney if you want to know what the best product for you to use is. Use a floor scraper to remove any loose debris. For old adhesive or mortar, this may require some elbow grease and possibly grinding to remove from the subfloor and allow the new mortar to bond so if you are unsure it is better to contact concrete floor grinding contractors for professional advice. Floor tiles can be installed by floor preparation contractors directly onto a concrete subfloor.
Whether wooden or concrete, the importance of this step is to make sure your subfloor is clean and free of debris. For better results you should consider hiring floor preparation contractors so not to waste your money.
STEP 2: DETERMINE STARTING POINT AND PRACTICE LAY PATTERNS
The purpose of this step is to minimize waste and less tile cuts and it makes the job go as smoothly as possible so laying out your tile pattern, planning for fixtures, cabinets and the like should be done in advance.
There are many patterns to choose from, though some work better with specific tile shapes and sizes. Most popular are herringbone, brick bond and basket-weave/parquet. You should determine this prior to selecting your tile, but if you are using traditional square tiles, a linear or grid pattern is timeless and easy to install. This is tile laid next to each other.
Determine your starting point in the room. Typically you will want full tiles in the most visible or focal points in the room, cut tiles against cabinets or less visible walls in the room. Measure your room to determine the centre, and snap chalk lines on the floor to guide your installation. Make sure to leave equal space at either side so you don’t tile up one side with a full tile and have partial or cut tile on the other. Every space is different, so take your time and plan accordingly. The goal is to get as many full field tiles down on the floor and leave the custom cuts for around obstacles, under appliances, and against the outside wall areas.
HOW TO SQUARE A ROOM FROM SIMPLE TILE INSTALLATION
 For most simple applications, floor tiles can be laid out in a grid pattern that starts at the center of the floor, so that cuts at the edges of the floor will be consistent at opposite walls. To achieve this, floor preparation contractors use a method to divide the floor into four quadrants that intersect in the middle of the room. These quadrants should be square to each other, however, this may be an issue in older homes where the room itself is unlikely to be truly square. Don’t rely on the wall positions to set up your grid, but rather square it yourself at the center.
- Measure one side of the floor, find the middle and mark it with a pencil. Do the same along the opposite side of the floor.
- Snap a chalk line across the floor, from one mark to the other. Spray with hairspray to keep the line from smudging.
- Measure and mark the middle for the two remaining sides of the floor. Lay the snap line from one mark to the other so it intersects the first line in the centre of the room. Don’t snap the line.
- Lay a carpenter’s square at one of the four corners of the intersection created by the chalk line that you laid first and the string. If the line and the string are truly perpendicular, then each will run right alongside one edge of the carpenter’s square.
- Adjust the string, if necessary, so it is completely square against the chalk line. Once the string is square to the line, snap the string. Spray with hairspray to keep the line from smudging.
- Start laying your floor tile, using the centre + as you are starting point. If you’re laying tile, you don’t have to leave any buffer space around the edges, as tile does not expand or contract like other flooring materials would.
EZYGRIND – PAVING YOUR FLOORS TO BETTER DAYS
Floor preparation contractors are important when it comes to floor covering preparation and tile installation. They have the knowledge and skills that will make your room, or in this case, your bathroom a different space. Floor preparation contractors are involved from start to finish so that means from planning to the last day they are working you can always ask for guidance and professional advice. We only hire professionals and people who have extensive knowledge and experience to service our clients and to make sure the project would run smoothly and successfully.
Get a quote for our floor preparation services by filling out the form below: